Quick and Easy Tie-Dye Handkerchiefs
Published Date
June 03, 2020
Handkerchiefs are the universal accessory; you can use them to tie up your hair, wear as a scarf, accent a handbag and so much more. However you like to wear your handkerchiefs, do it with the trend that's taking the season by storm - tie dye! Got a few minutes? Club Crafted shows you how quick and easy it is to create your boldest new accessories using Tulip Two-Minute Tie Dye and cotton handkerchiefs.
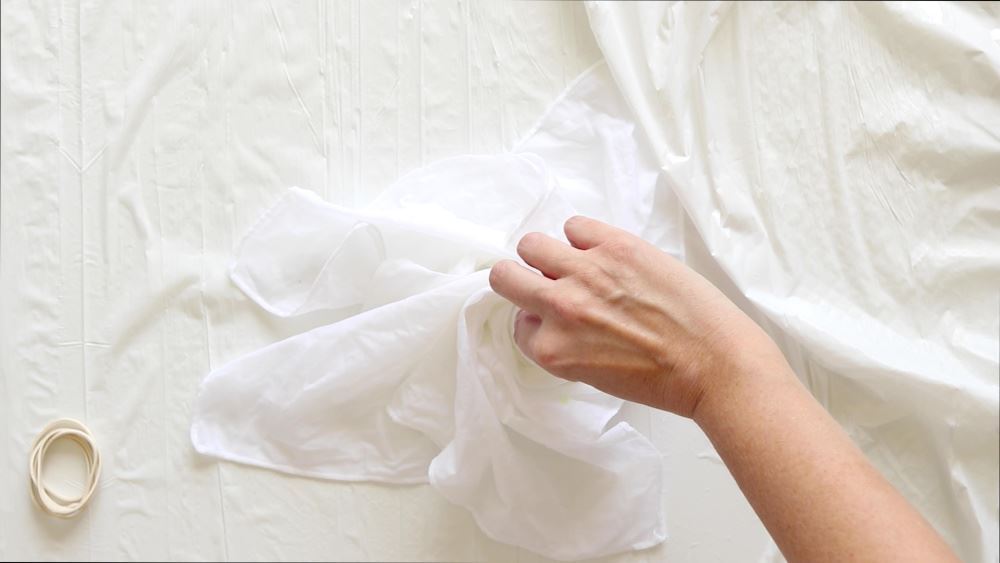
Prep your work surface by covering with a disposable plastic surface cover, then wash your handkerchiefs (without fabric softener) and leave damp. Decide which tie-dye techniques you want to try on your handkerchiefs. For this one, Club Crafted used the spiral tie-dye technique. Lay your damp handkerchief out flat, then pinch the fabric in the center and twist it into a swirl.
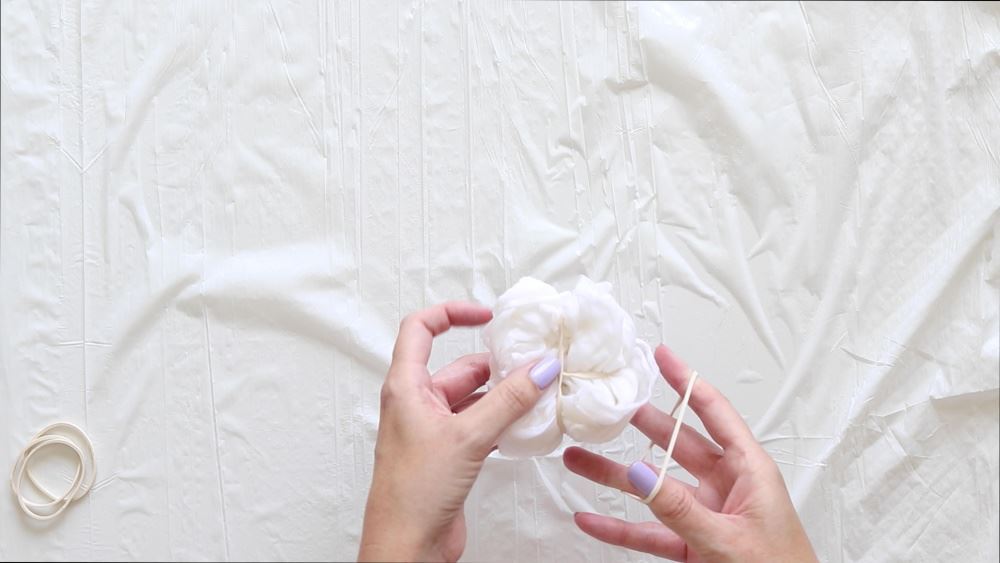
Bind your swirled handkerchief with 3 rubber bands, crisscrossing the rubber bands to create 6 wedge shapes. Set aside.
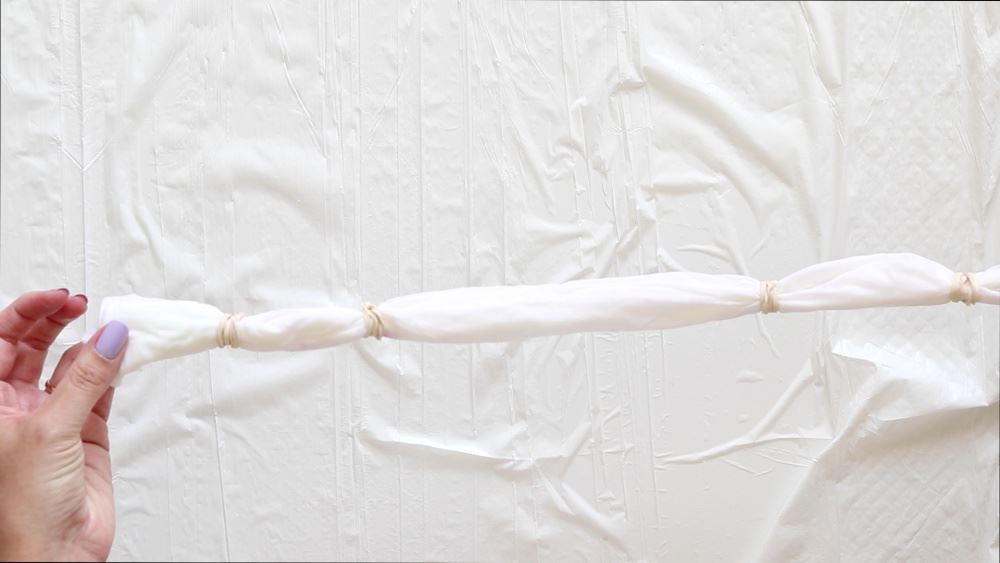
For the next handkerchief, Club Crafted used the stripes tie-dye technique. Accordion pleat your entire damp handkerchief with even pleats, then bind by wrapping rubber bands spaced along the handkerchief. Set aside.
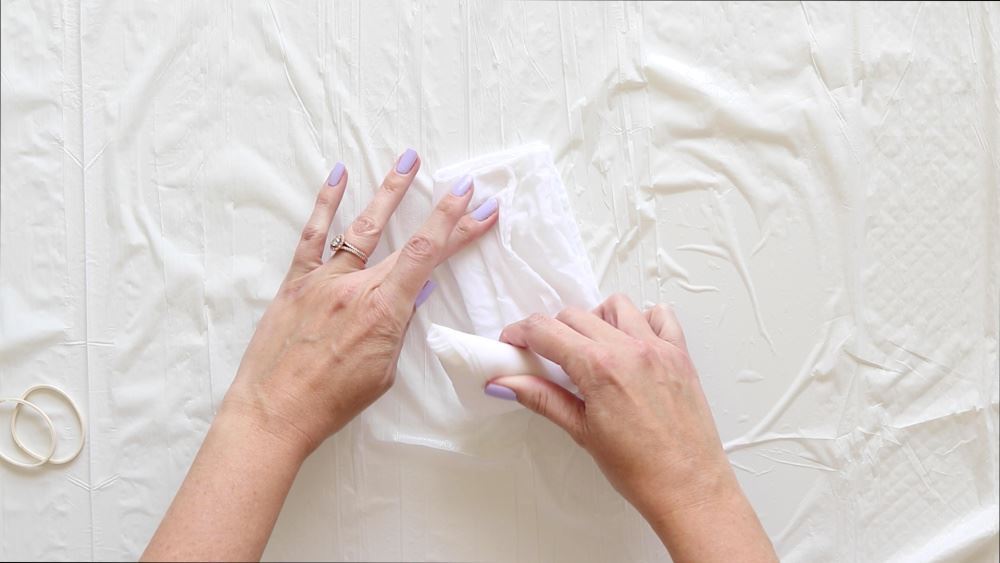
For the last handkerchief, Club Crafted used the triangle fold, a technique similar to the folding tie-dye technique to create a cool grid pattern. To achieve this, lay the damp handkerchief out flat, then accordion fold the fabric from one side all the way to the other. Starting at one end, fold one corner over to meet the folded edge on the opposite side, forming a triangle shape. Fold this triangle shape back, accordion style, creating another triangle section. Continue accordion folding your triangle folds across the length of your fabric. Bind with a rubber band around each corner.
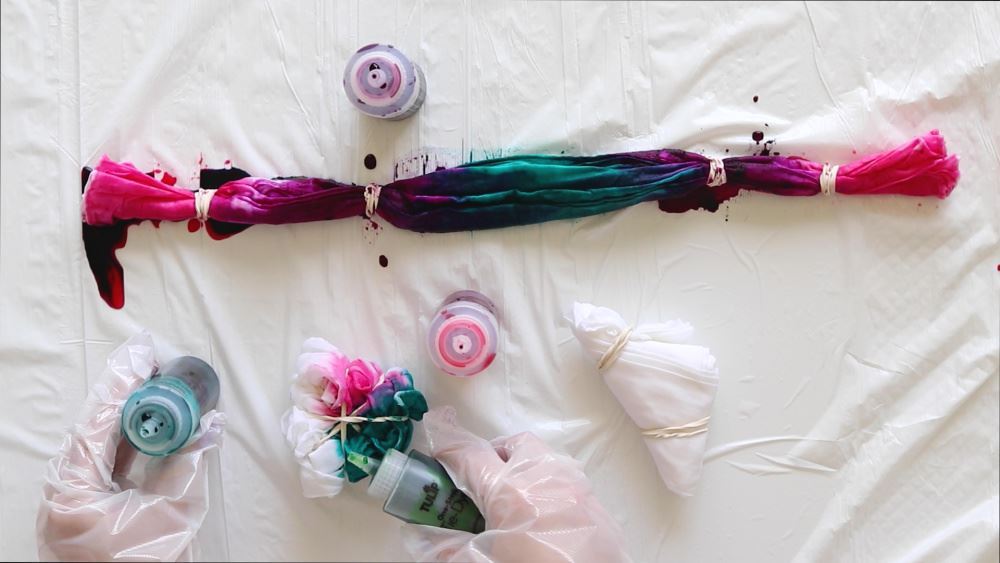
Add water to your dye bottles and shake to mix, then apply desired colors to each of your bound handkerchiefs. You can add the dye in any patterns you like - there's really no wrong way to do it! Don't forget to flip your projects over and apply dye to the other sides as well.
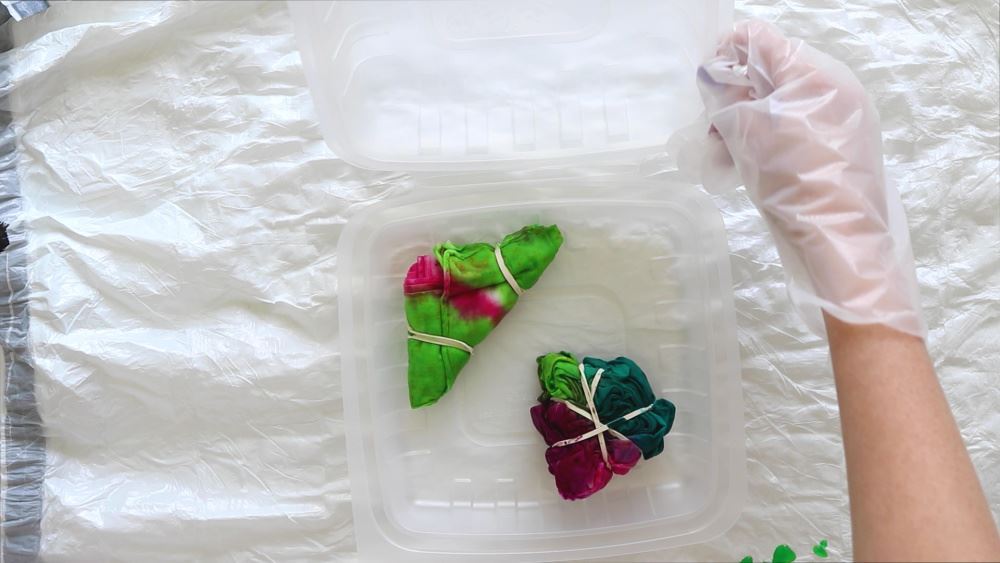
Check to make sure your projects are still damp in all areas. If any portion has dried, mist with a spray bottle to re-dampen. It's important that the projects are completely damp when microwaving so as not to scorch the fabric. Place your dyed projects into the Two-Minute Tie-Dye Container and snap the lid securely shut. Process according to your instructions.
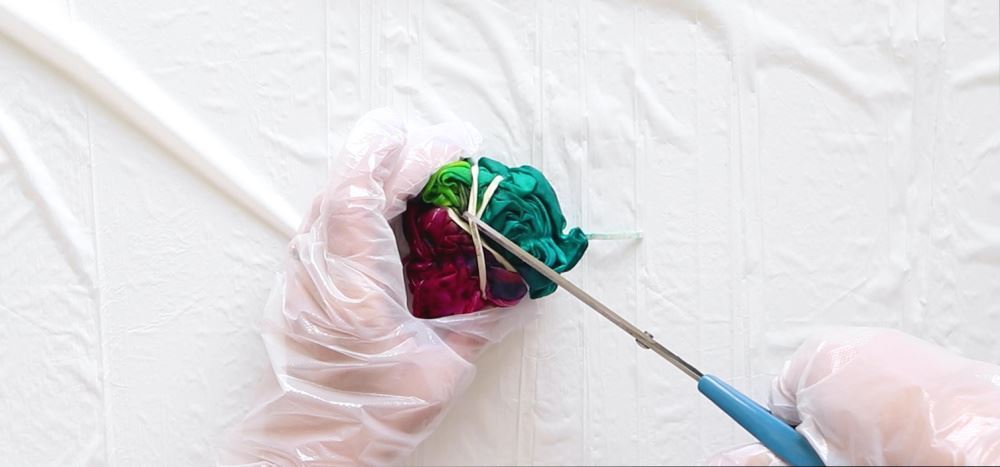
Once your handkerchiefs have processed and cooled according to the instructions in your kit, remove the rubber bands, then rinse and launder per your instructions.
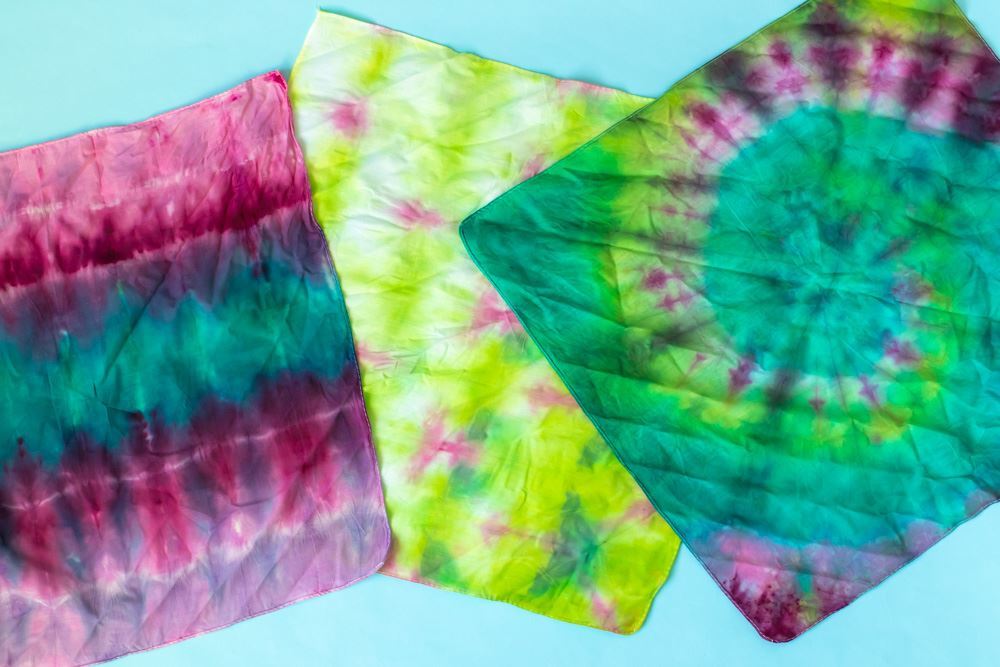
Such a quick and easy way to make yourself some bold new accessories!
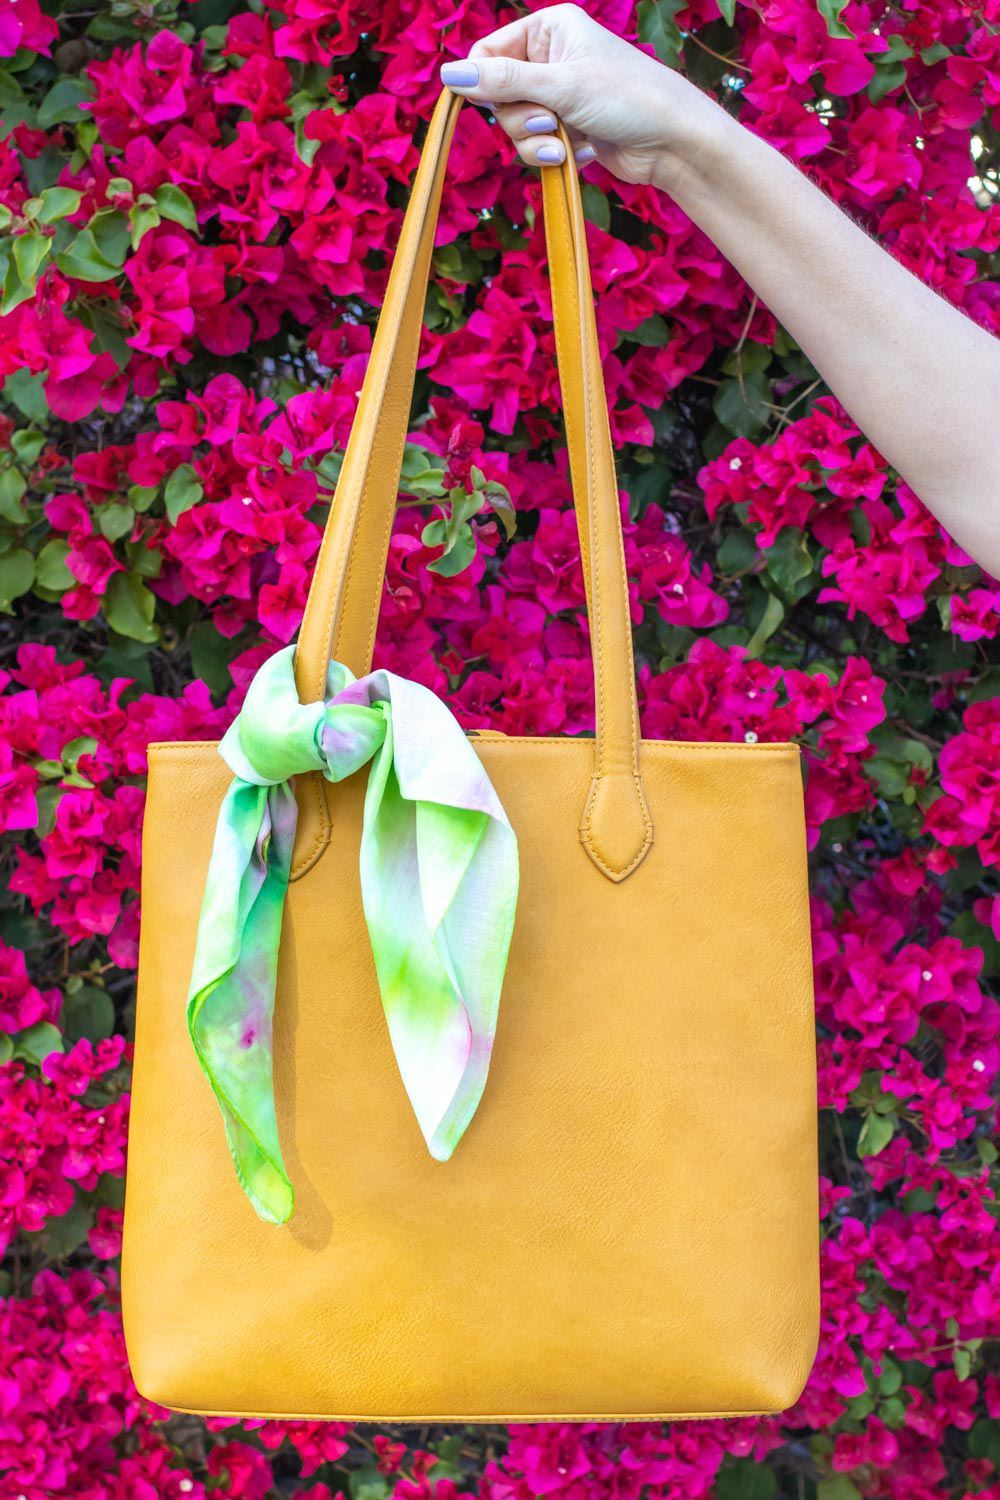
Now you have some fun new tie-dye handkerchiefs on the ready for any and every summer excursion!


 if (Model.AutoCompleteEnabled) { }