Easy DIY Tie-Dye Garland
Published Date
June 01, 2020
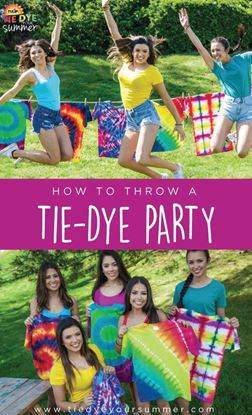
Whether it’s a graduation, birthday, an engagement, or it’s just finally Friday night, there’s always a reason to celebrate! Handmade Charlotte shows us how to put the perfect finishing touch on any festivity or brighten any room with decorative color using this joyful tie-dye garland. Bring in the spirit and fun of the biggest summer bashes, even if the bash is now virtual! There’s no reason not to celebrate life’s little moments, and this adorable and easy project will be there to remind you of all you have to enjoy!
What you need:
- Tulip Two-Minute Tie-Dye Kit of choice
- 100% cotton white cloth napkins
- Rotary cutter and a cutting mat, or scissors
- Double-sided tape
- Yarn or string
- A plastic cover to protect your workspace
- Microwave
- Oven mitts
- Disposable plastic surface cover
Swirl and bind damp cloth napkins

Prep your workspace by protecting it with a disposable plastic cover. Wash your white cloth napkins (without fabric softener), making sure they are completely damp. For this garland, Handmade Charlotte used the spiral tie-dye technique, but feel free to use any tie-dye technique you’d like! To make the spiral design, lay your damp cloth napkin flat on your work surface. Pinch the center of the cloth between your fingers and twist your wrist in a clockwise motion until you create a spiral. Crisscross two rubber bands in an ‘X’ shape to secure.
Add water to dye bottles and shake to mix

Mix your dye! Fill your One-Step Dye bottles to the fill line, tighten the lid so it is secure, and shake until the dye is completely dissolved. Do this for all colors you wish to add to your garland.
Add dye colors to fabric

Put on the gloves provided in the kit and get ready to dye your spiral. Handmade Charlotte uses two colors on each cloth in an alternating pattern for her design, but you can use as many colors as you’d like, such as a different color for each wedge! Think about how you can incorporate your favorite color combos and get to work dyeing the segments of your spiral. Be sure to saturate each segment fully with color, and don’t forget to flip your bound fabric over and add dye to matching sections on the back side.
Place dyed fabric into Two-Minute Tie Dye Container

Once you’ve added your dye colors, make sure the fabric is still completely damp before placing it into the Two Minute Tie-Dye container. If any portion of the fabric has dried, mist with a spray bottle until saturated again. Close the lid tightly and microwave for the time recommended in the instructions based on your project and microwave wattage. Wearing oven mitts, carefully take the container out of the microwave, and let it cool for 15 minutes with the lid still intact so your dye can finish processing. Open the lid and let the fabric cool for an additional few minutes, until it is cool to the touch. Check out your product instructions for more detailed information!
Rinse and launder fabric napkins according to instructions

Once the project is cool, carefully cut off the bands to see your design! Rise the cloth under cool water until the water runs clear, then proceed to wash and dry the fabric according to kit instructions.
Cut cloth into desired shapes

After your fabric is clean and dry, using a rotary cutter and cutting mat or scissors, cut your cloth napkins into smaller squares, rectangles or any shape or design you can think of! Leave one top edge of each piece of fabric with a straight edge so you can attach it to the string in the next step.
Attach string to fabric with double-sided tape

Lay out your cut shapes in the order you want them for your garland, with the straight edges in line along the top. Keep a small and even space between each cloth. Apply a piece of double-sided tape to the top edge of each cloth and lay one piece of yarn or string along the tape. Fold the top over into the tape to secure the fabric to the string. Repeat process, creating a new strand for each color, or have fun with it and mix and match your tie-dye fabric any way you like!
Display your garland just the way you like

Hang your garland in front of your favorite video chat background and be prepared to immediately want to celebrate the (virtual) night away! PS. When the fun is done, hang your tie-dye garland in any room for added color that’ll make you smile on the daily.


 if (Model.AutoCompleteEnabled) { }