-
 if (Model.AutoCompleteEnabled) { }
- PRODUCTS
- PROJECTS
- TECHNIQUES
- Faqs
Published Date May 06, 2020

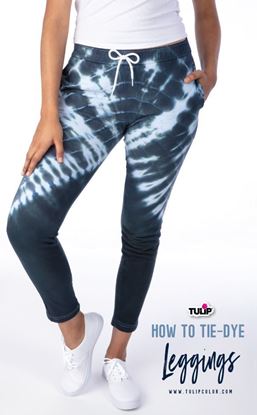
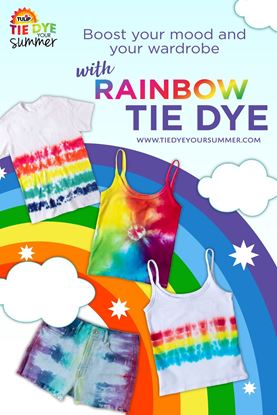
Most of us are living in loungewear right now, and we can't say we're overly upset about it. What's not to like about being super comfortable all day long? But just because we're dressed to chill, doesn't mean we can't look good doing it. That's why we're all about these rainbow tie-dye leggings from Club Crafted; they're bright, colorful and basically make us feel like we're walking on sunshine. Check out the tutorial and get motivated to brighten up your own wardrobe with rainbow tie-dye leggings (and shirts, sweatshirts, socks ... and ... and)!
- Tulip One-Step Tie Dye Party Kit of choice
- White 100% cotton leggings
- Disposable plastic surface cover
- Wire rack
- Sealable plastic bag or plastic wrap
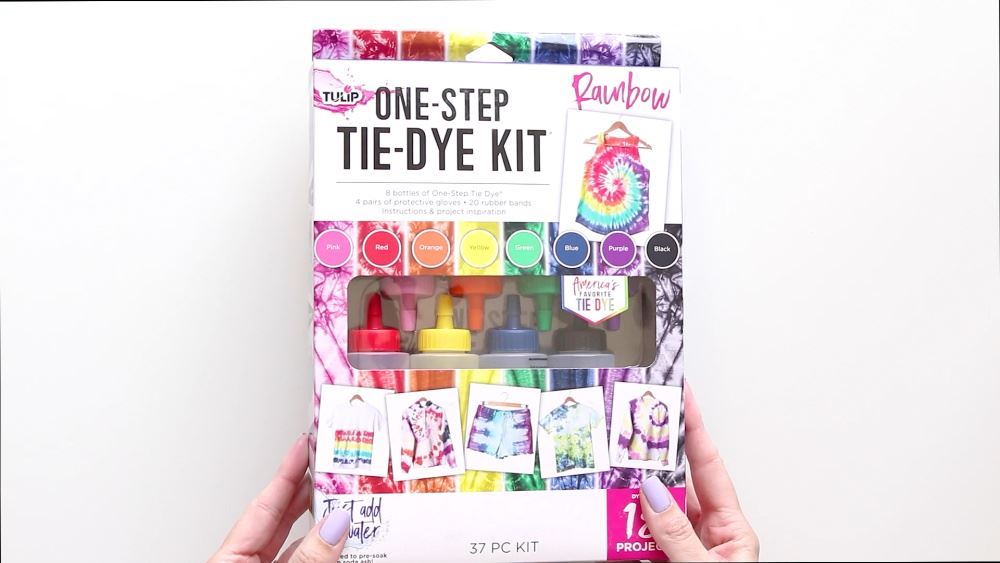
For these leggings, Club Crafted used the Tulip Rainbow Tie-Dye Kit that's now available at Target® Stores, but if you're shopping on this site, check out our Tulip Tie-Dye Party Kits for a fantastic selection of rainbow dye colors.
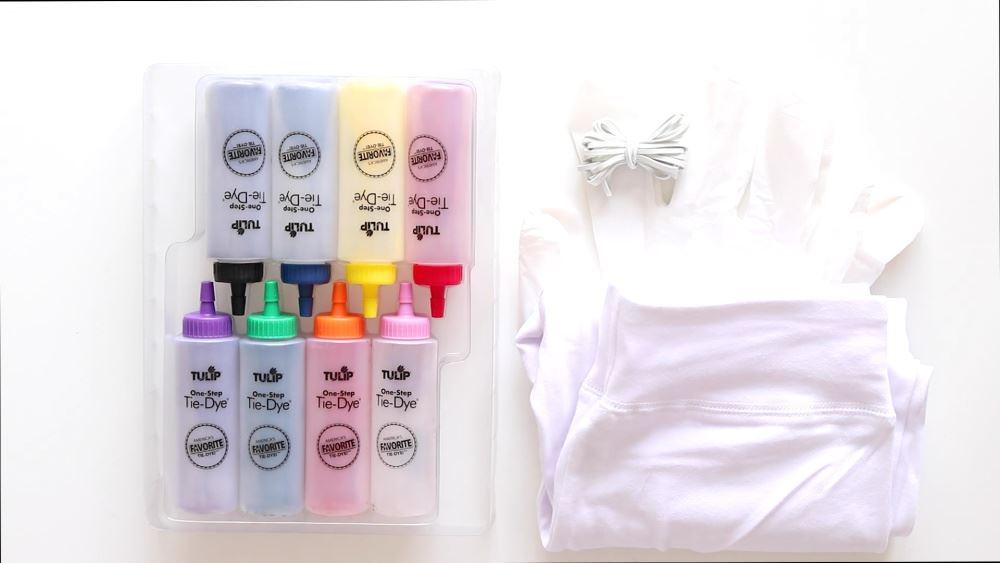
To make a proper pair of rainbow tie-dye leggings, you're going to want to use at least 5 or 6 (or more) One-Step Dye colors, so make sure you choose a kit with at least that many! Wait to mix your dyes until you're ready to actually use them.
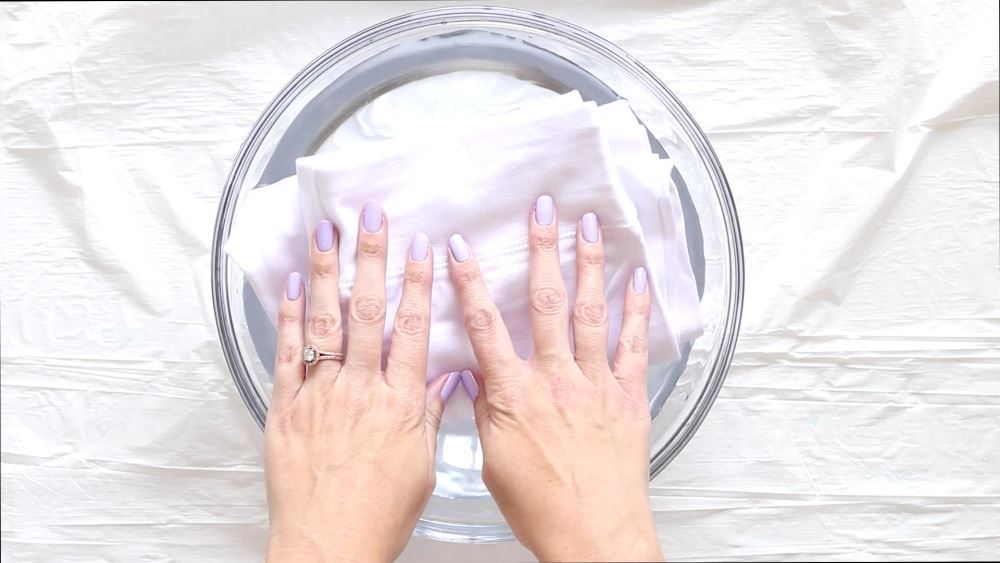
Pre-wash your leggings (without fabric softener) and leave damp. One-Step Dyes already come with soda ash in the dyes, so you don't need to presoak your leggings in soda ash before tie dyeing. Cover your work surface with a protective plastic.
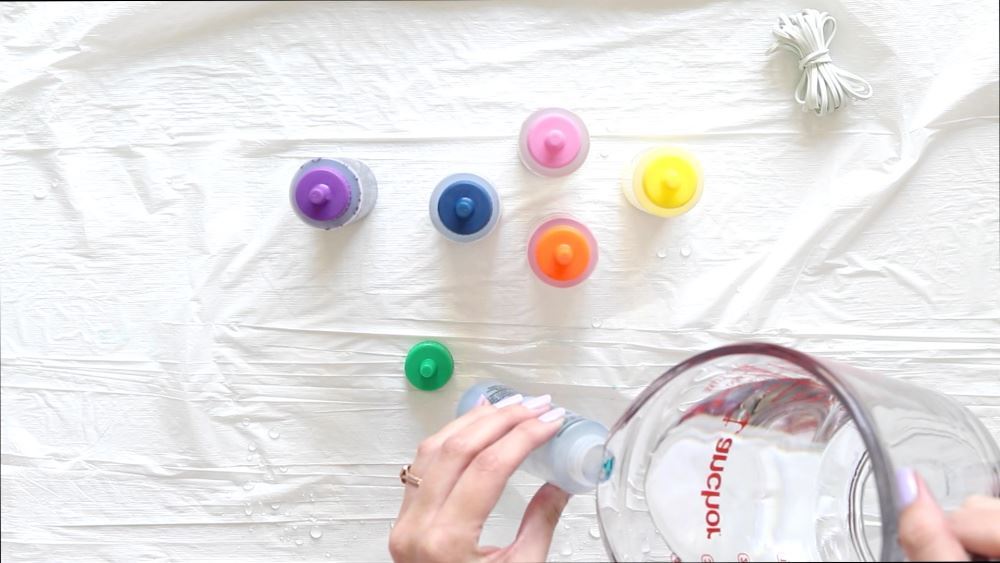
Mix your dyes by filling each bottle with water and shaking to mix. Make sure all dye powder has dissolved before using.
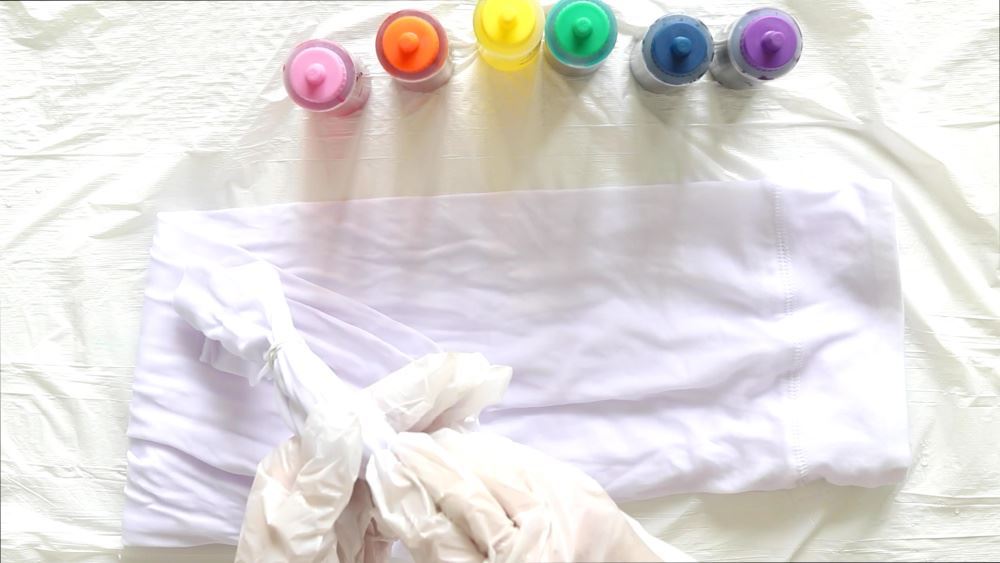
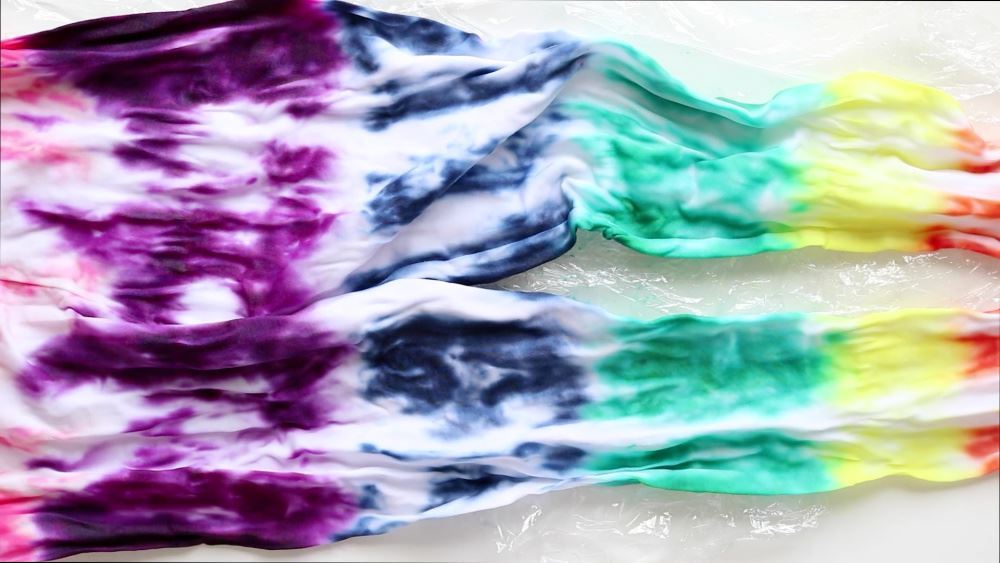
Fold your damp leggings in half so your tie dye will match on each leg. Scrunch the legs together and wrap rubber bands around the leggings several inches apart, all the way up the leggings. You'll need 6 or 7 (or more) rubber bands.
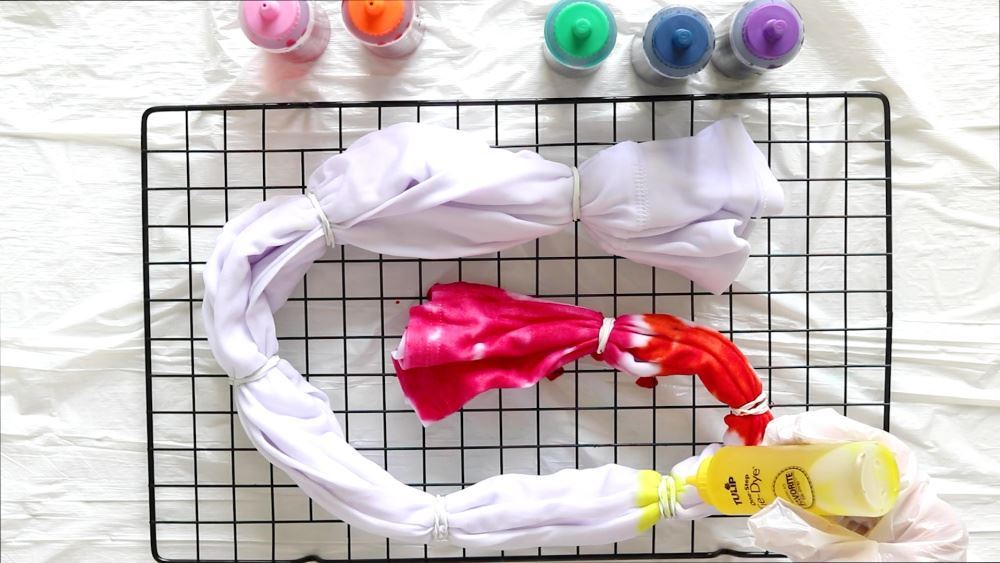
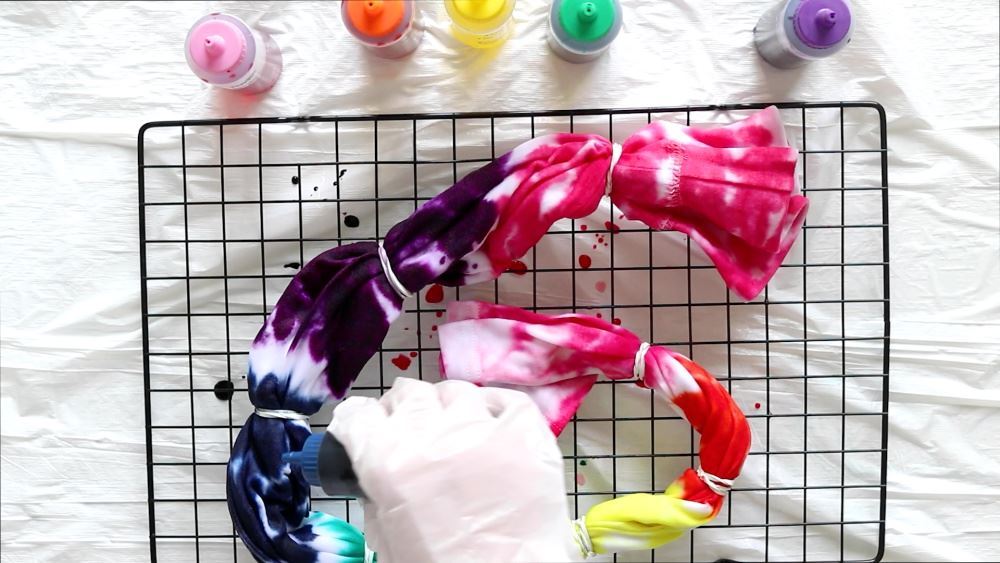
Place your banded leggings on a wire rack to help prevent the dye from pooling underneath and mixing up colors where you don't want them. Begin adding a different dye color to each banded section, making sure to rotate the leggings as you add dye to get all sides.
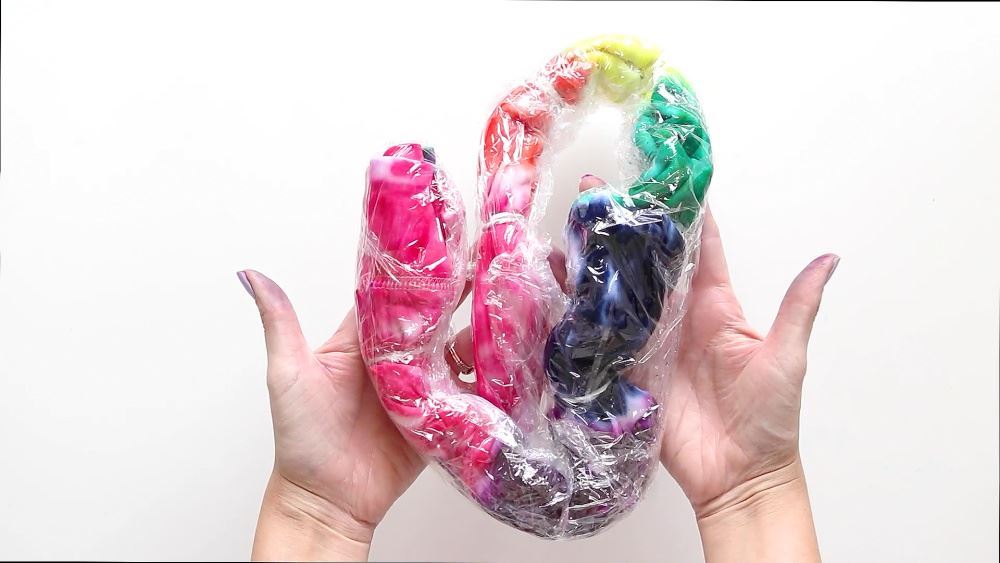
Once you've added dye to each section, place leggings in a sealable plastic bag or wrap in plastic to keep damp while the dye processes for the recommended time.
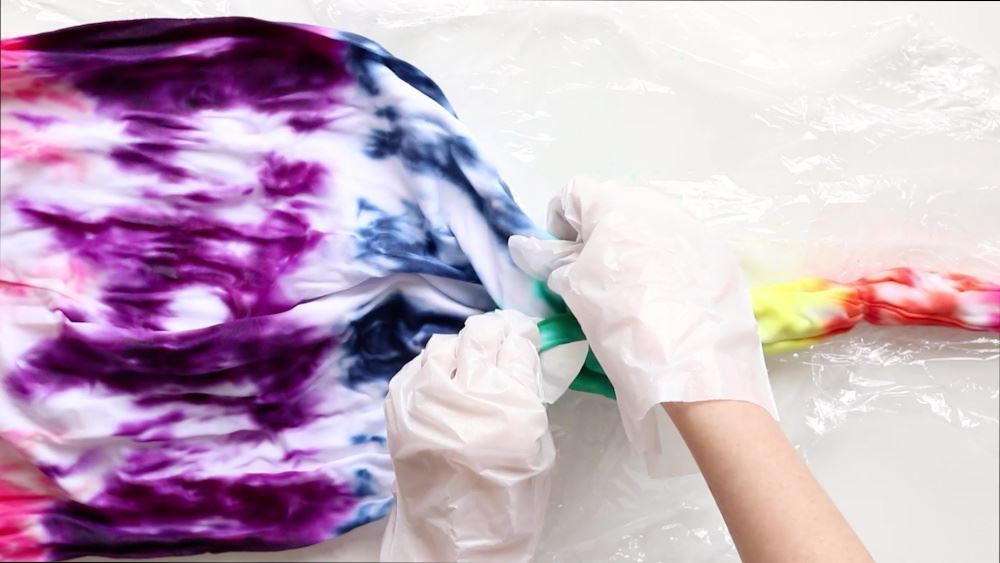
After the dye has processed completely, remove the leggings from the plastic and remove the rubber bands (cutting them if needed).
The reveal is so exciting! Rinse and launder according to your dye and fabric instructions.
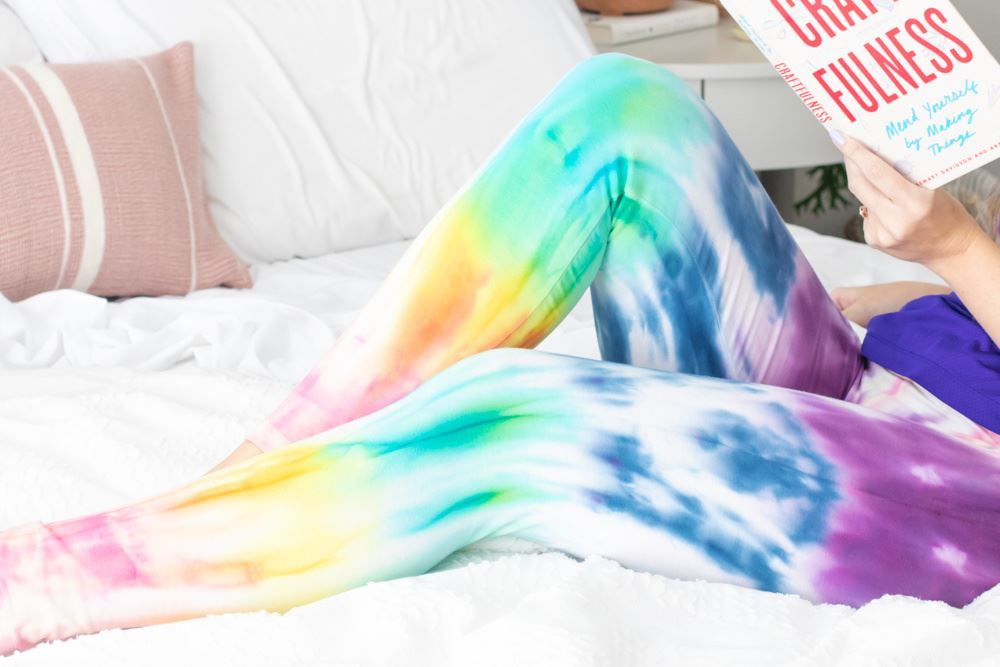
Kick back and relax in your new rainbow tie-dye leggings that will clearly brighten up any room you walk into!