Pinterest Script
 
Welcome to the World of Tulip Tie Dye! Our Terms & Conditions and Privacy Policy have been updated.

Frequently Asked Questions

Tie Dye FAQS

Have questions about tie dye ?

We have answers! Check out our list of frequently asked questions to find the answer you're looking for. Don’t see it? Contact us now.

Need help?

Give us call at: 1-800-438-6226.


Tie Dye FAQS

Learn More About Our Family of Tulip® Dyes

Our Tulip One-Step Tie-Dye Kits include great color combinations of permanent dyes that are packaged in easy squeeze bottles, so all you have to do is add cold tap water, shake it up and tie dye! This saves you time and it’s easy to do—no special soaking, no extra ingredients needed.

Tulip One-Step Dyes are formulated differently than our other dyes and activate with just the addition of cold water, which makes packing the dyes in their easy applicator bottles ideal. They’re great for creating a variety of multi-color (or one color) tie-dye effects.

Tulip Permanent Fabric Dye requires very hot water and salt mixed in a larger container such as a bucket or sink to activate, and is ideal for one-color dyeing. 

Tulip Permanent Fabric Dye is meant for one-color dyeing, so we recommend Tulip One-Step Dyes for tie-dyeing or dyeing a fabric multiple colors.

Getting Started

Tulip One-Step Tie-Dye Kits can be purchased at participating retailers such as: Hobby Lobby, Jo-Ann Fabrics, Michaels, Meijers and Walmart, as well as on Amazon.com.

For Africa, Europe, UK, Middle East, Russia:

Graffititag.co.uk

Tel +442381 159 099

Email kaeley@graffititag.co.uk

For Australia, New Zealand:

Rossdale email sales@rossdale.com

For Canada:

Michaels Arts & Crafts Canada

http://locationsca.michaels.com

Walmart Canada

https://www.walmart.ca/en

Amazon Canada

https://www.amazon.ca/

For all other international locations, contact Rebecca.Burton@ilovetocreate.com 

For Australia, New Zealand:

Rossdale email sales@rossdale.com

For Africa, Europe, UK, Middle East, Russia:

That's Original Ltd

Tel +442381 159 093

Email: samantha@thats-original.co.uk

For all other inquiries, contact rebecca.burton@ilovetocreate.com 

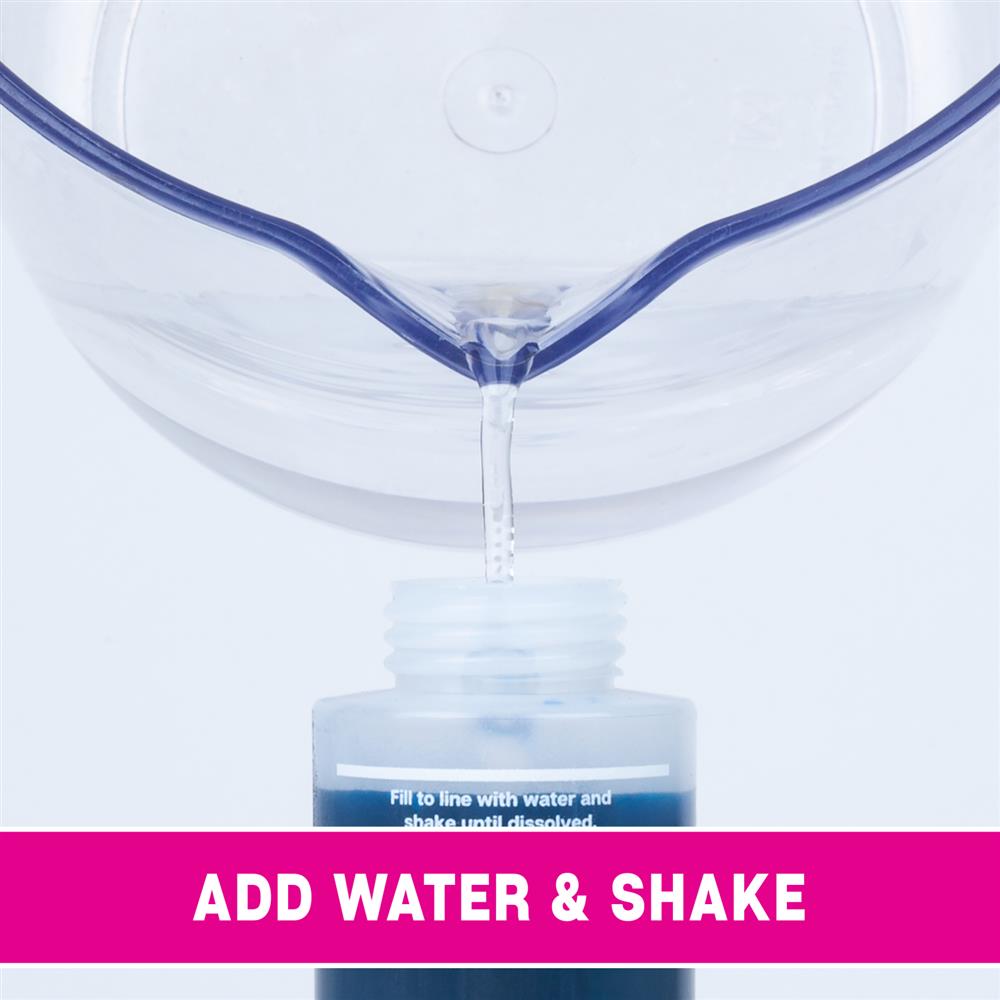
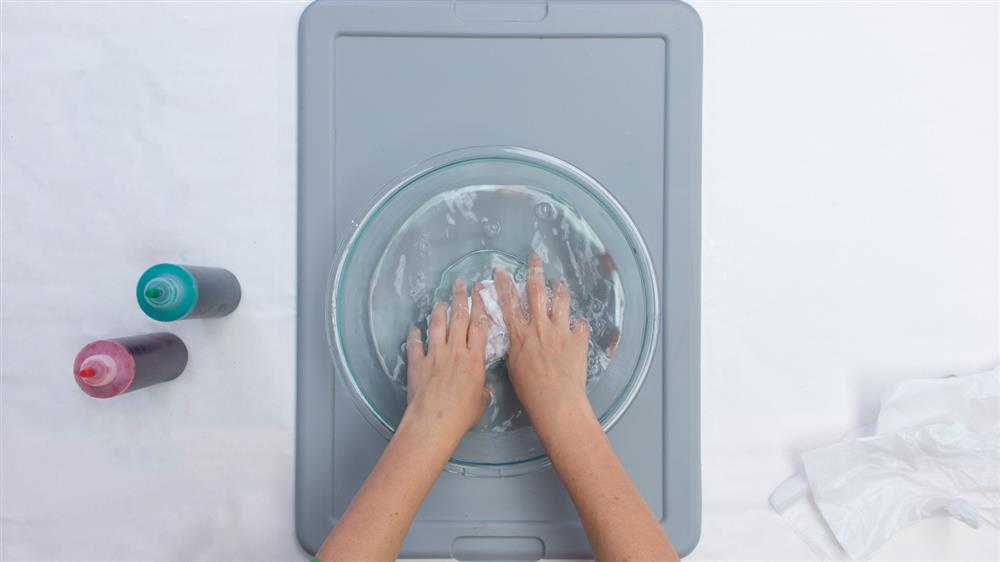
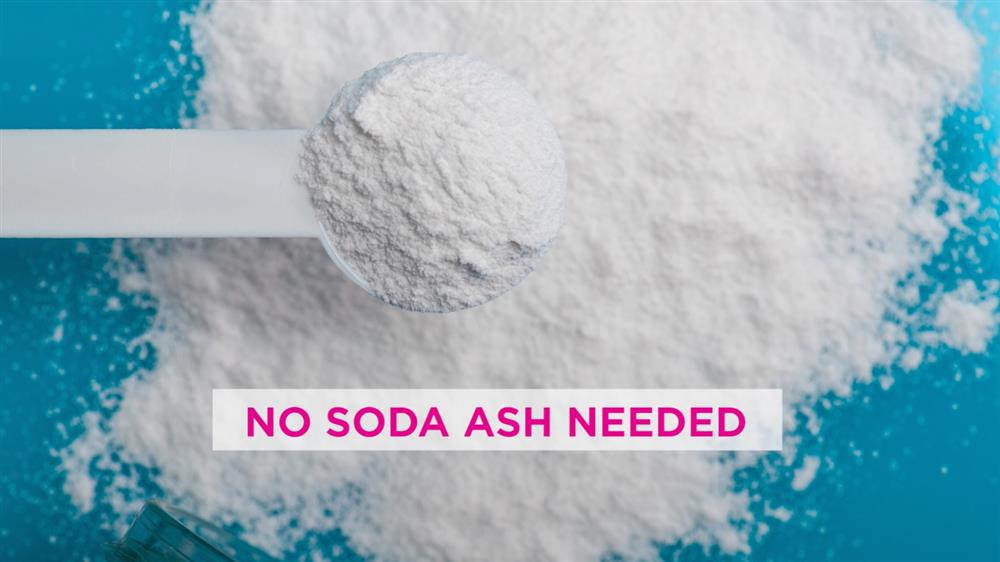
The best tie dye kits for color vibrancy include soda ash that allows you to presoak your fabrics, making them more receptive to the dye. The fastest method for great color vibrancy and without the wait time of the presoak is to use kits with powder dye and dye fixative already mixed in the bottles. These kits allow you to go straight to applying the dye.

Tulip Artisan Tie Dye kits provide you with the more traditional approach where you will need to presoak.

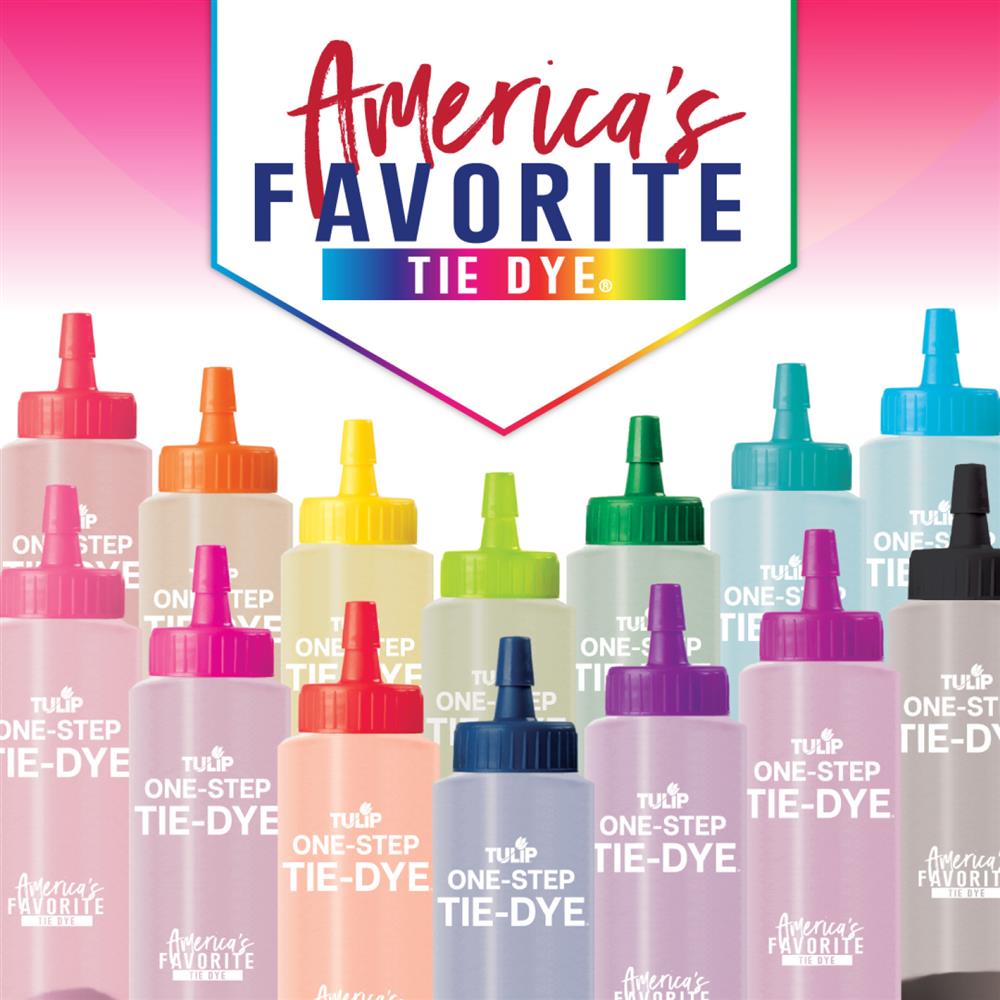
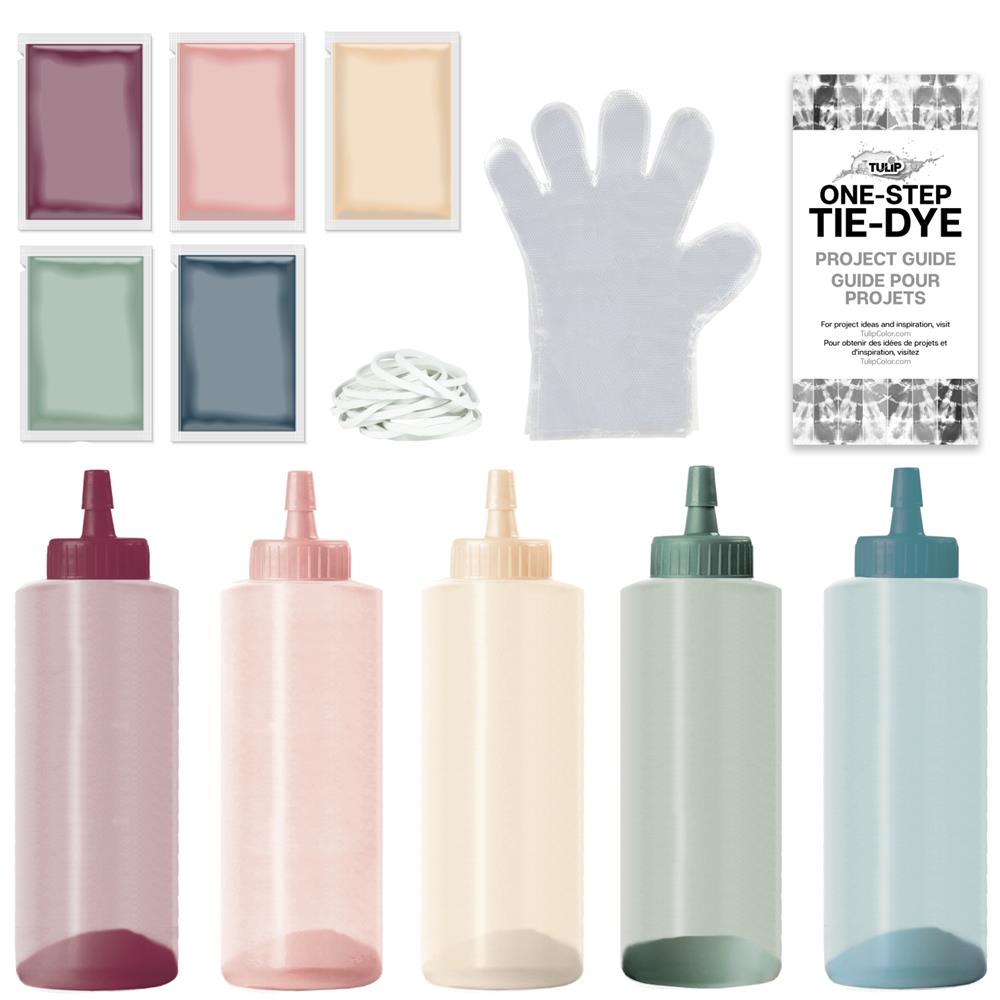
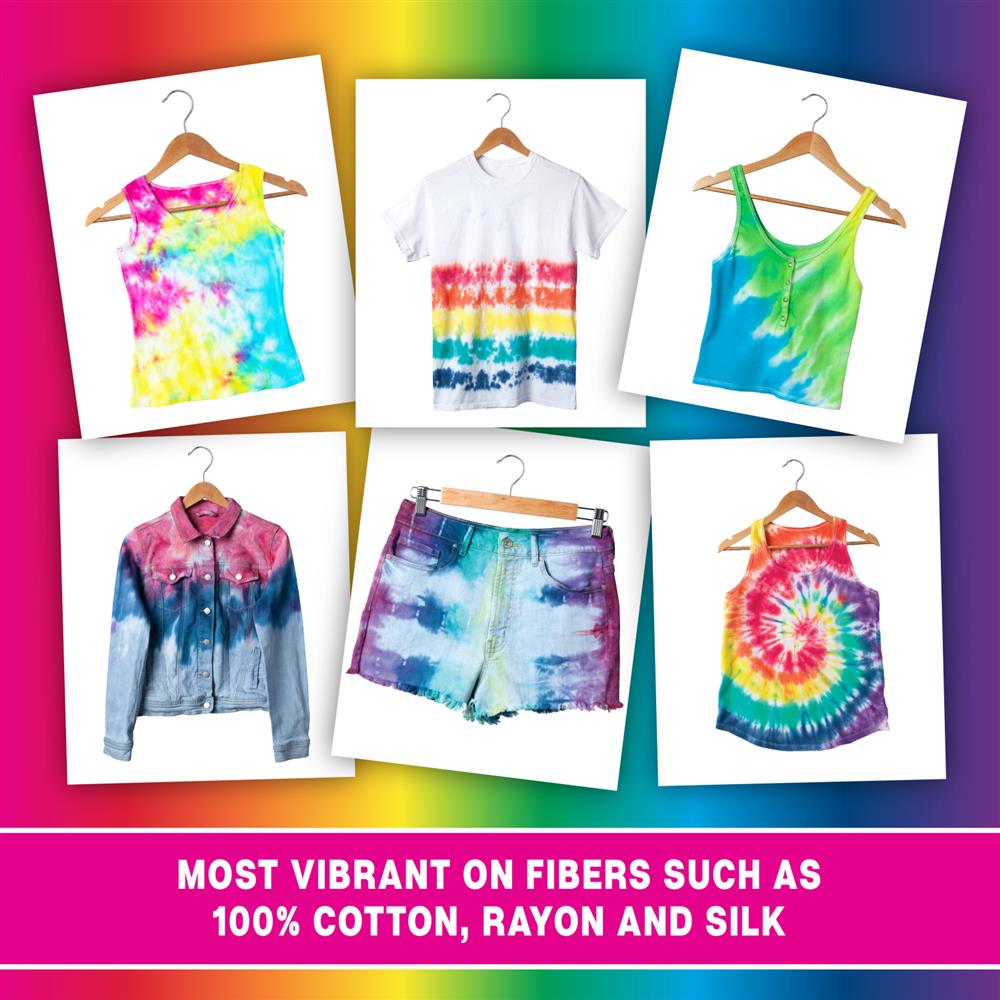
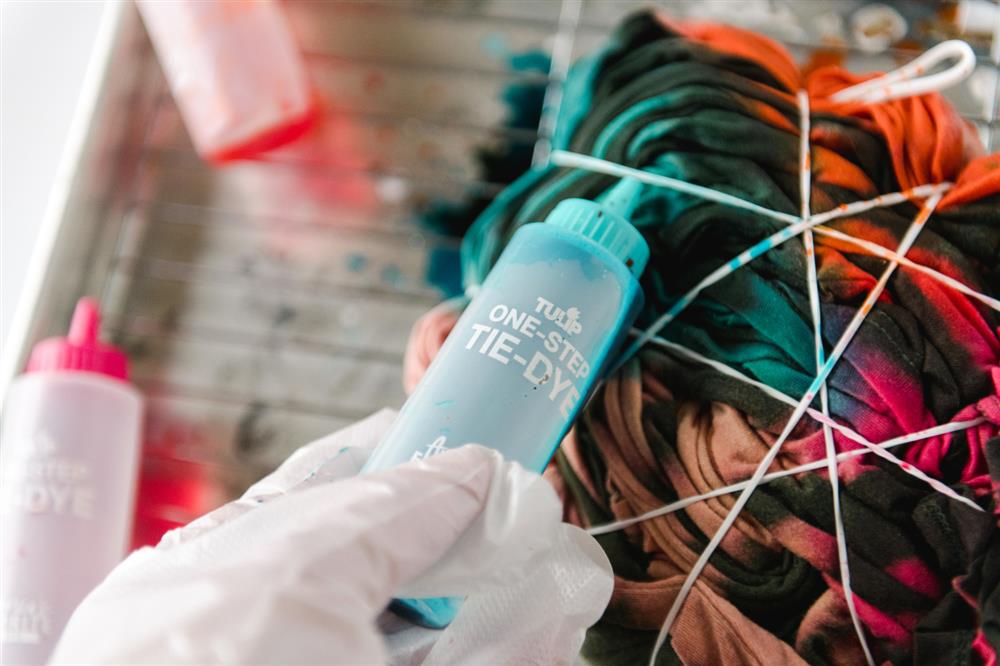
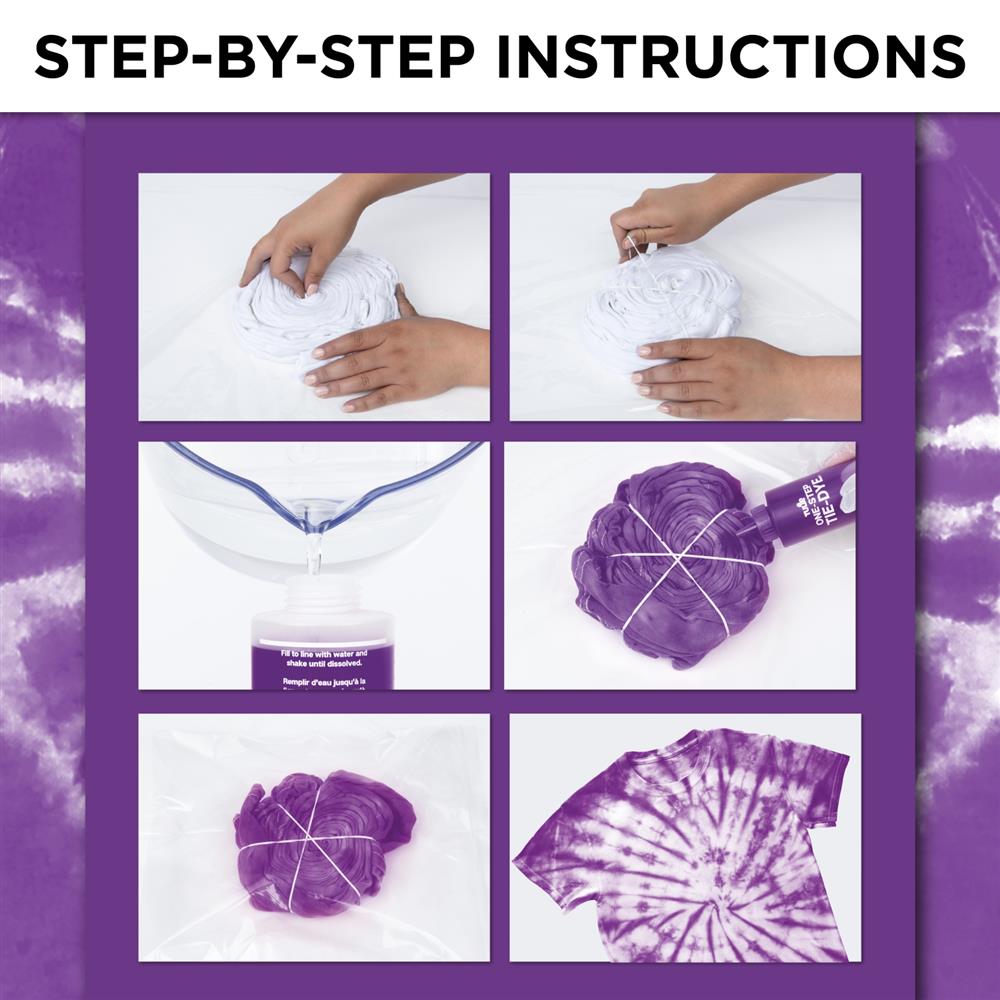
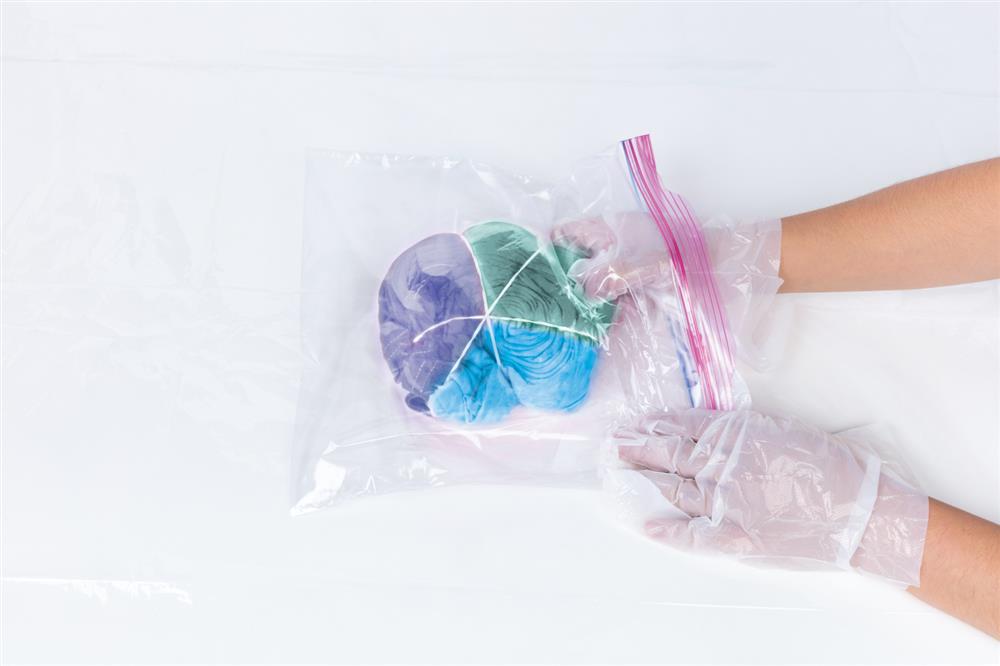
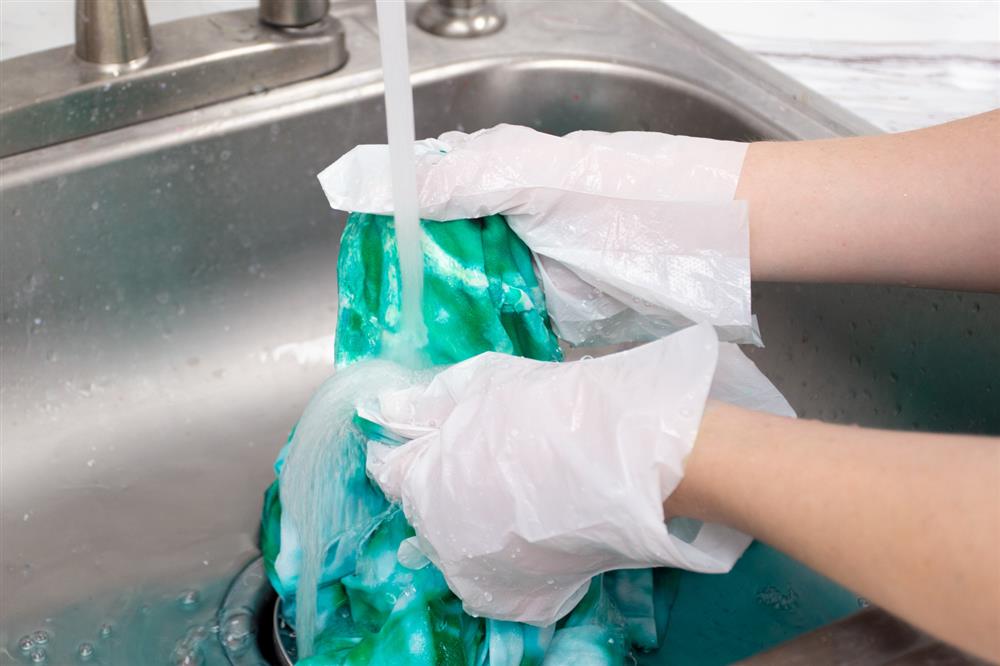
Tulip One-Step-Tie-Dye Kits already include dye fixative in the formula. In addition to being extremely easy to work with, these kits produce super vibrant colors with long-lasting results, especially when using natural fibers like 100% cotton, rayon, and silk. These offer everything you need for your tie-dye success!

The answer to your question is yes. However, all Tulip tie-dye products come with the necessary dyes, applicator bottles, gloves, and instructions to ensure a successful experience. Other dye products may require heat or hot water to set correctly, and they do not come with applicator bottles that make it possible to achieve many of today's more popular looks.

  1.      Natural-fiber (100% cotton, rayon, silk) fabric for dyeing (T-shirts, socks, curtains, pillowcases)
  2.      Tie-Dye Kit
  3.      Protective work surface
  4.      Plastic bag or plastic wrap to seal project while dye sets
  5.      Disposable gloves
  6.      Rubber bands
  7.      Scissors (if necessary)
  8.      Sink or tub for rinsing
  9.      Washing machine and dryer

Note: Tulip Tie-Dye kits include applicator bottles with powdered dyes, protective gloves, rubber bands and tie-dye instructions. Some kits also include disposable plastic table covers and refill dye packets so you can reuse your applicator bottles.

We recommend using our tie dye products on fabrics that are 100% natural, such as cotton, rayon and silk. Our dyes are formulated to absorb into the natural fibers, which is why they hold their color so well, washing after washing.

Manmade synthetic materials such as polyester, acrylic, nylon, etc. do not absorb these dyes very well or sometimes not at all. If you want to experiment, try on a similar fabric swatch first.

Polyester is a difficult fabric to dye, especially if it is 100% polyester. This is because polyester is a synthetic fabric made from petroleum, making it resistant to absorbing dye. For the sharpest and brightest tie-dye patterns, use natural fibers like cotton and rayon because they absorb dye much better.

Yes! As part of your tie-dye instructions, it is always recommended to prewash your fabric before dyeing it so you get the best dye absorption. Washing removes the sizing that was added at the factory and will resist the dye.

No, you don’t! Our Tulip One-Step Dyes are specially formulated with soda ash already in the dye powder, so all you have to do is add water, shake it up and you will be ready to create all of your favorite tie-dye designs.

No need for a salt soak, but we do recommend washing your fabric to remove the sizing (a product that keeps the fabric stiff and minimizes wrinkles), as sizing can block the full absorption of the dye pigment. And don’t use your fabric softener in the wash cycle—it adds in more chemicals that may affect the dye colors.

We generally recommend washing your fabric and leaving it damp before tie dyeing, as the dye has an easier time saturating the fabric when it’s wet. But depending on the technique and the look you want, you can apply dye to dry fabric. Just make sure the fabric has been washed (if it’s new) to remove the sizing. Applying dye to dry fabric results in more color saturation but less uniform permeation throughout the fabric.

Our dyes are formulated to be the brightest and last the longest on natural fabrics. That said, however, we’re all about creative experimentation and new ways to apply tie-dye techniques! We’ve seen our dyes used on hair extensions and to create tie-dye looks on paper and wood… Just be sure to test first so you won’t be disappointed with the results. Just remember not to use our tie-dye products on utensils or items that come into contact with food.

No, our Tulip One-Step Dyes activate with cold tap water—they’re super easy to use! Just add tap water up to the fill line marked on the bottle and shake, and you’re ready to go.

It depends on what you want to make and the tie dye design and look you’re going for. If you want to tie dye the fabric a darker color, we recommend using a tie-dye color within the same color family as the existing color on the fabric (i.e. from Light Pink to Fuchsia). Any color outside of the color family may turn muddy or brown. Bleaching out the colored fabric before tie dyeing will not completely remove the base color and may not create better results when tie dyeing. But to make it really easy, try using one of our Tulip Reverse Dye Kits for great results!

Most Tulip One-Step Tie-Dye Kit bottles have a printed fill line close to the neck of the bottle. A few bottles do not. In that case, fill with water up to right below the neck of the bottle. This will allow you enough room to shake and dissolve the powdered dye into the water.

No, because each type of Tulip Dye is created with a different application purpose in mind. Tulip One-Step Dyes are formulated differently than our other dyes and activate by adding cold tap water to the dye in the easy applicator bottles—a super fast way to prep and go for tie-dye techniques.

Our Tulip Permanent Fabric Dyes require very hot water and salt in a larger container such as a bucket or sink.

Each binding tool creates a slightly different effect, but all work great for binding tie-dye projects.

Accidentally inhaling a little bit of tie-dye powder might turn the inside of your nose or tongue the color of the dye, and may cause irritation. Remove as much dye as possible with running water, and get medical attention if irritation persists.

If it is accidentally ingested, please follow these instructions:

First Aid Treatment: Contains organic dye and sodium bicarbonate. If swallowed, contact a poison control center or doctor immediately. Do not induce vomiting. If in eyes, rinse with water for 15 minutes. If on skin, rinse well with water.

Making Tie-Dye Magic

The best way to tie dye for beginners is to buy a kit! The Tulip One-Step Tie-Dye Kits come with everything you need to be successful. The kits include applicator bottles with the powdered dye so all you have to do is add water! The kits also include disposable protective gloves, rubber bands and easy-to-follow tie-dye instructions for beginners. It’s also important to remember that there is no wrong way to tie dye. Every outcome is unique and that’s what makes tie dyeing so fun!

There are many tie-dye techniques, and some are more complex than others. For beginners, these are the most popular tie-dye techniques:
• Spiral
• Bullseye
• Crumple (The crumple is simple enough for kids to do)

Each of our Tulip Tie Dye kits has an instruction sheet with an eclectic group of tie dye patterns from which to choose. Each design has easy-to-follow step-by-step instructions. For more step-by-step techniques, video tutorials and detailed instructions, visit our tie-dye techniques page.

Generally, we say that each 4 fl. oz. bottle of tie dye can create up to 3 medium-sized adult T-shirts. This depends on the overall color coverage, as well as fabric’s saturation. We have noticed that beginner tie dyers and children tend to use more dye than what is needed, so we recommend you allocate one 4 fl. oz. bottle of dye per person when hosting events or parties.

  1. Prep your fabric by prewashing it. 
  2. Secure with rubber bands based on technique chosen.
  3. Add dye color on each side.
  4. Let your project set 6-8 hours or overnight.
  5. Remove rubber bands to reveal design.
  6. Rinse, wash, dry and wear.

Yes! A fun tie-dye technique that can expand your creative process is to create new colors by mixing dyes. Either pour the powdered dyes together into one bottle and then add water, or add water to your dyes and then mix the liquid dyes. Always shake well to ensure they are well blended.

Yes! A crucial step in your tie-dye instructions is to cover dyed fabric with plastic wrap or put it in a sealed plastic bag to keep damp while the dye sets. If it begins to dry, it could affect the colors and cause some staining issues.

In order to achieve the best dye saturation, your tie-dye instructions say to cover and let set 6-8 hours or longer for more intense colors.

But if you are not wanting to wait that long to see your finished results, don’t fret! There is an alternative method called Two-Minute Tie Dye. This innovative process lets you use your kitchen microwave to speed up the dye setting process to a mere two minutes. The patent-pending containers and bags protect your damp project while also setting the dye into the fabric in the microwave. 

Tie-Dye Clean Up

We know accidents happen! Use paper towels to immediately absorb the spilled dye (remember to keep your gloves on). If the dye was spilled on a surface such as laminate or tile, try cleaning up any remaining stains with a bleach product. If the dye was spilled on an unvarnished absorbent surface like wood, you might not be able to remove any remaining stains. This is why we strongly recommend using disposable plastic tablecloths or large trash bags to protect your work surface before tie-dyeing.

In general yes, it is safe to dispose of leftover dye by pouring it down a drain. You may want to check your city’s waste disposal regulations as a precaution.

The dye will eventually wear off, but if you don’t want to wait, you can try a heavy-duty soap like Lava Soap. Sometimes we like showing off our colorful hands, but we do get funny looks.

One of the key tie-dye instructions is to not add water to your dye until you are prepared to apply it. It is best to apply dye within 24 hours after mixing. Dye left unapplied after 24 hours will begin to lose concentration and will result in noticeably weaker color intensity.

Taking Care of Your Tie-Dyed Masterpiece

Follow these simple steps on how to wash tie dye projects for the first time:

Step 1: Rinse thoroughly.

Step 2: Place your dyed item in the washer all by itself. Add a small amount of laundry soap and set to the cold-water setting.

Step 3: Air dry.

Step 4: Wash and dry your newly dyed item separately for the first few washes.

It is best to rinse and wash tie dye in cold water to prevent fading. Continue washing your tie dye in cold water for the first few washes.

Only use detergent without color bleach or fabric softener to wash newly tie-dyed fabrics. Both fabric softener and color bleaching agents will pull the dye from the fabric, causing it to fade.

We only recommend washing multiple dyed fabrics together if they are dyed with the same color scheme. If the fabric items each have different colors, they should be washed separately to avoid muddying and dulling of the colors on the fabrics as they bleed out into the wash water.

Yes, as long as the fabric is dryer safe, you can dry it in the dryer after tie dyeing.

Some color change is normal after laundering because a small amount of tie dye washes out. Check the labeling on your fabric to make sure the fabric is 100% cotton or another natural fabric. If it’s polyester or a polyester blend, the fabric won’t absorb the dye as well and much of the dye will wash out during the wash cycle. If the fabric was not prewashed before tie dyeing, any sizing left in the fibers can also affect how the dye absorbs.

It shouldn’t stain your washing machine, but if you notice any discoloration, run another wash cycle (without fabric) and include at least a cup of bleach in the cycle.

Shipping Processes

Generally, all online orders are shipped and delivered by FedEx Economy.

Currently, we only ship within the United States. But we do have international distributors ready to help. Email us at info@tiedyeyoursummer.com and we can connect you, based on your country.

In general, all orders placed Monday through Friday will begin processing the following business day. Please note that orders placed on Friday will begin processing on the following Monday. We strive to ship your order within 48 hours (excluding weekends), however there may be delays due to holidays. Orders placed during promotional sales may take up to 3 additional business days to process. Delivery times do not include Saturday, Sunday or Holidays. An expedited freight option is provided when available as well, but will still be subject to the above conditions.

You should receive an email confirmation that your order was received as soon as you submit your order online. Once your order is processed and shipped, you will receive a shipping confirmation email for your order with tracking information. Please be sure to add our email to your email addresses and "Safe Senders" anti-spam list. If you do not receive either your order confirmation or shipping confirmation emails, please reach out to us at info@tiedyeyoursummer.com.

Once you order ships, you will receive an automatic shipping confirmation email from us with your tracking information. If you do not receive this email, please reach out to us at info@tiedyeyoursummer.com.

Please contact us at info@tiedyeyoursummer.com as soon as you realize you made a mistake. If the order hasn't shipped, we can look at making changes or adjustments for you.

Please reach out to your local carrier's office to track the package and see if they show where they left the package. In some cases, the package will be at the local carrier's office if no one was available to receive it.

Damages are the responsibility of the local carrier. Please reach out to them for next steps on your package.

If you receive a damaged or defective product, please contact us at info@tiedyeyoursummer.com. We will be happy to help you!

Close